Buttons
NOTE
This tutorial expects that you've already done the ping command tutorial so you can understand the basics of making flows, placing blocks, and inserting variables.
In this tutorial, we will be building a simple button that sends a message when clicked.
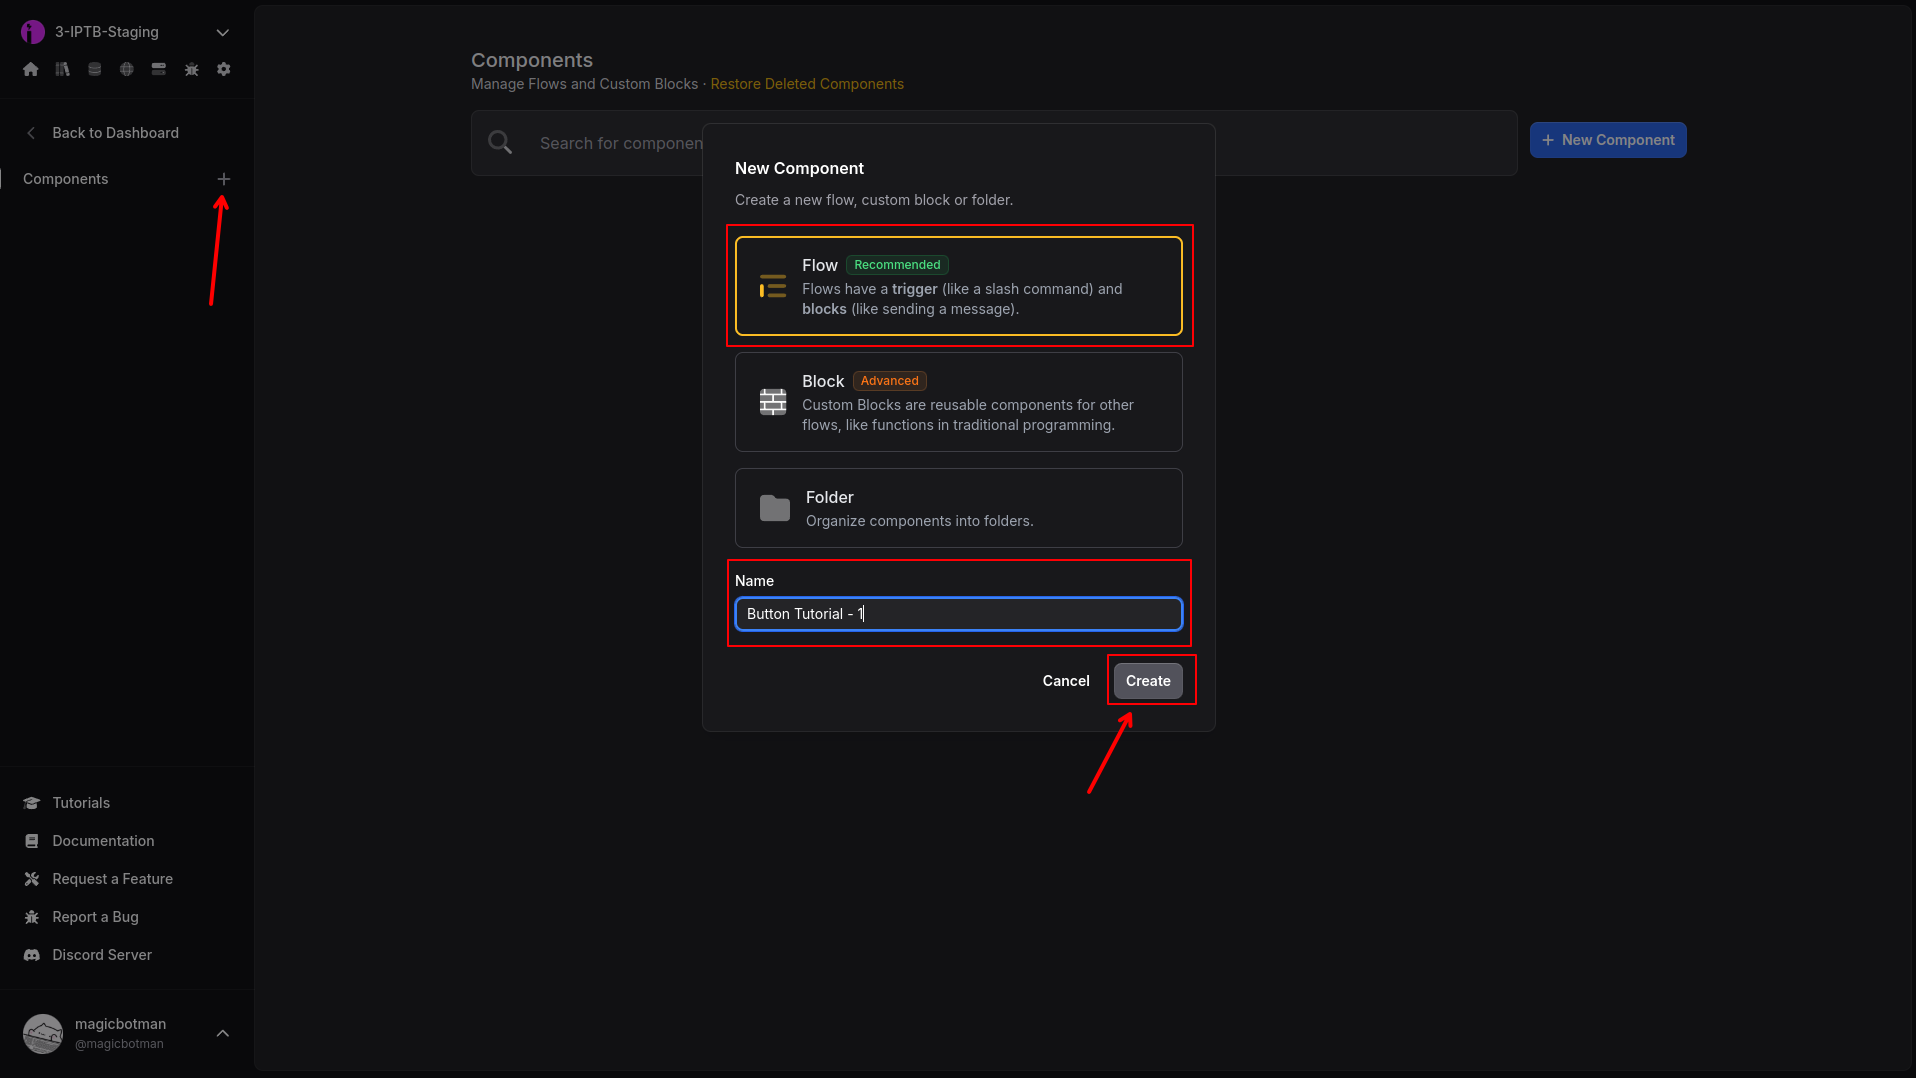
Step 1 - Create First Flow
Create your first flow. This flow will have a slash command, and will send the message with a button on it.
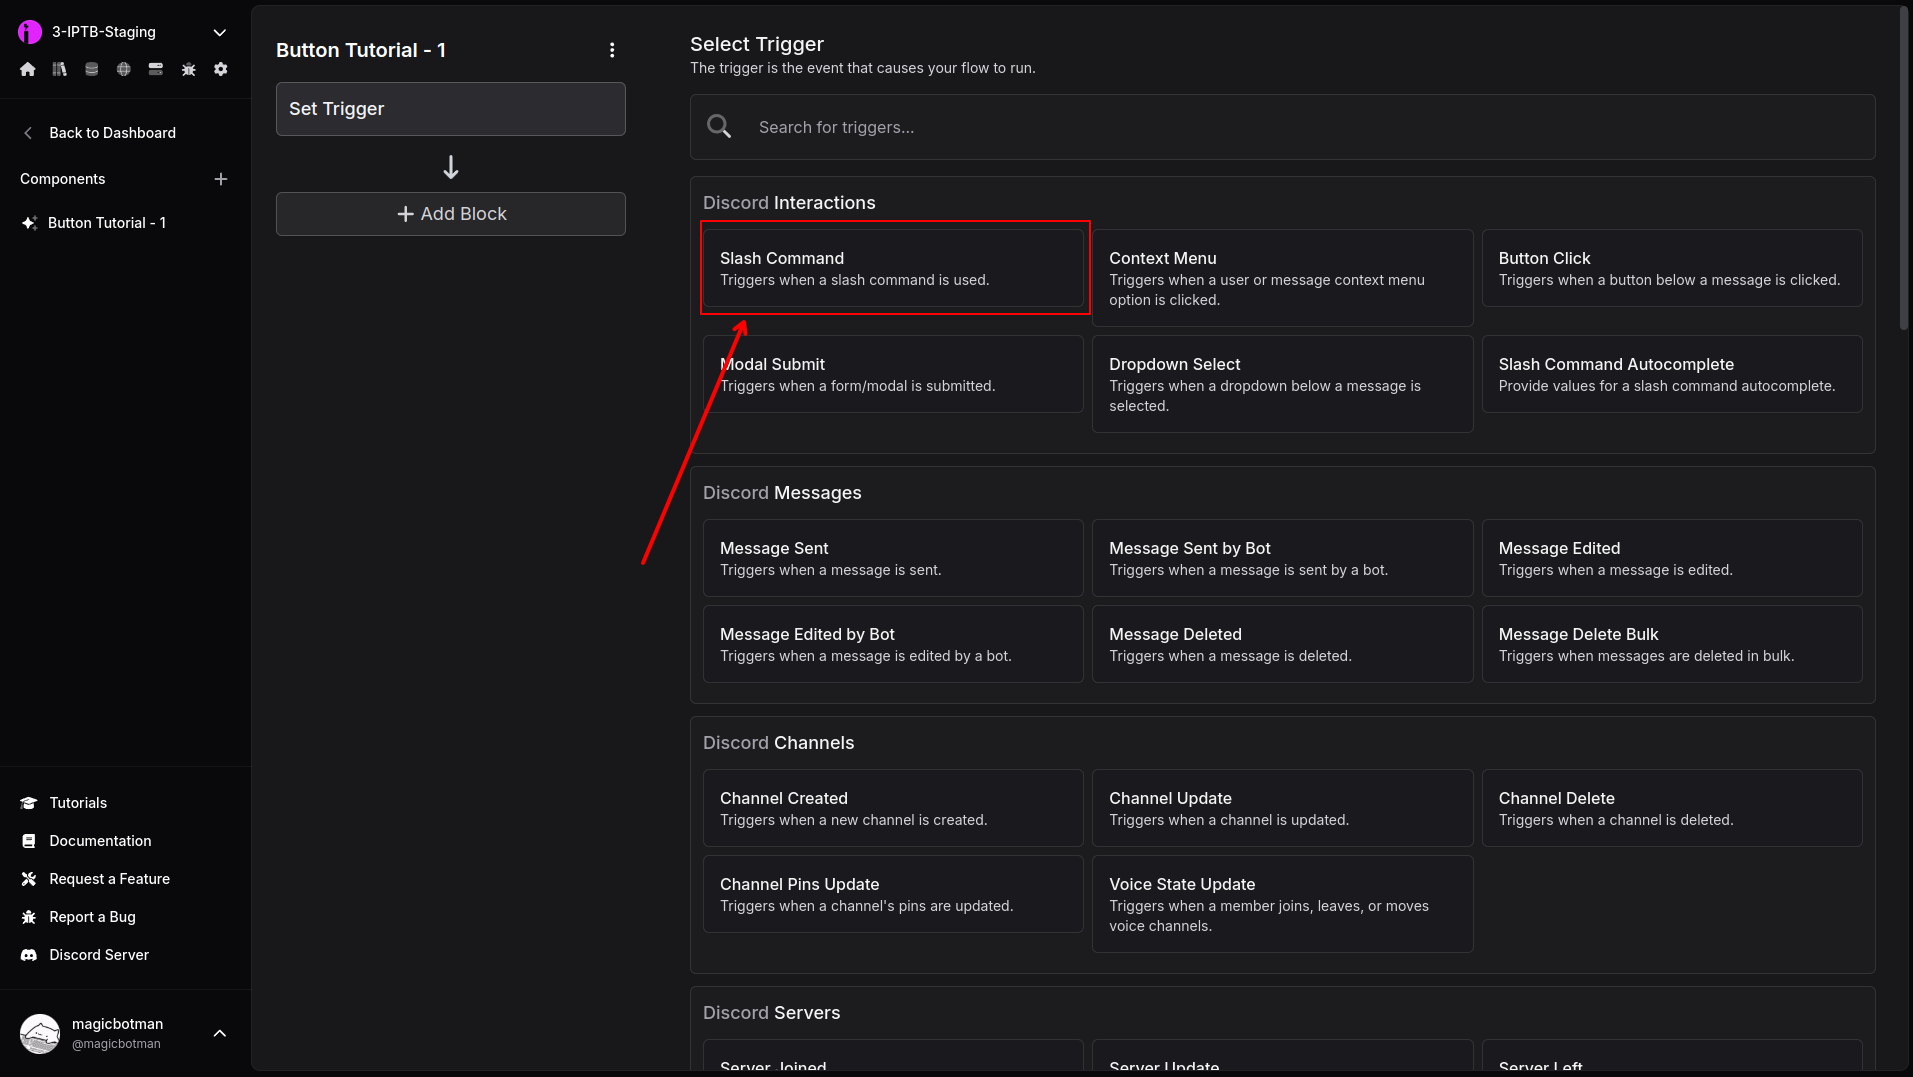
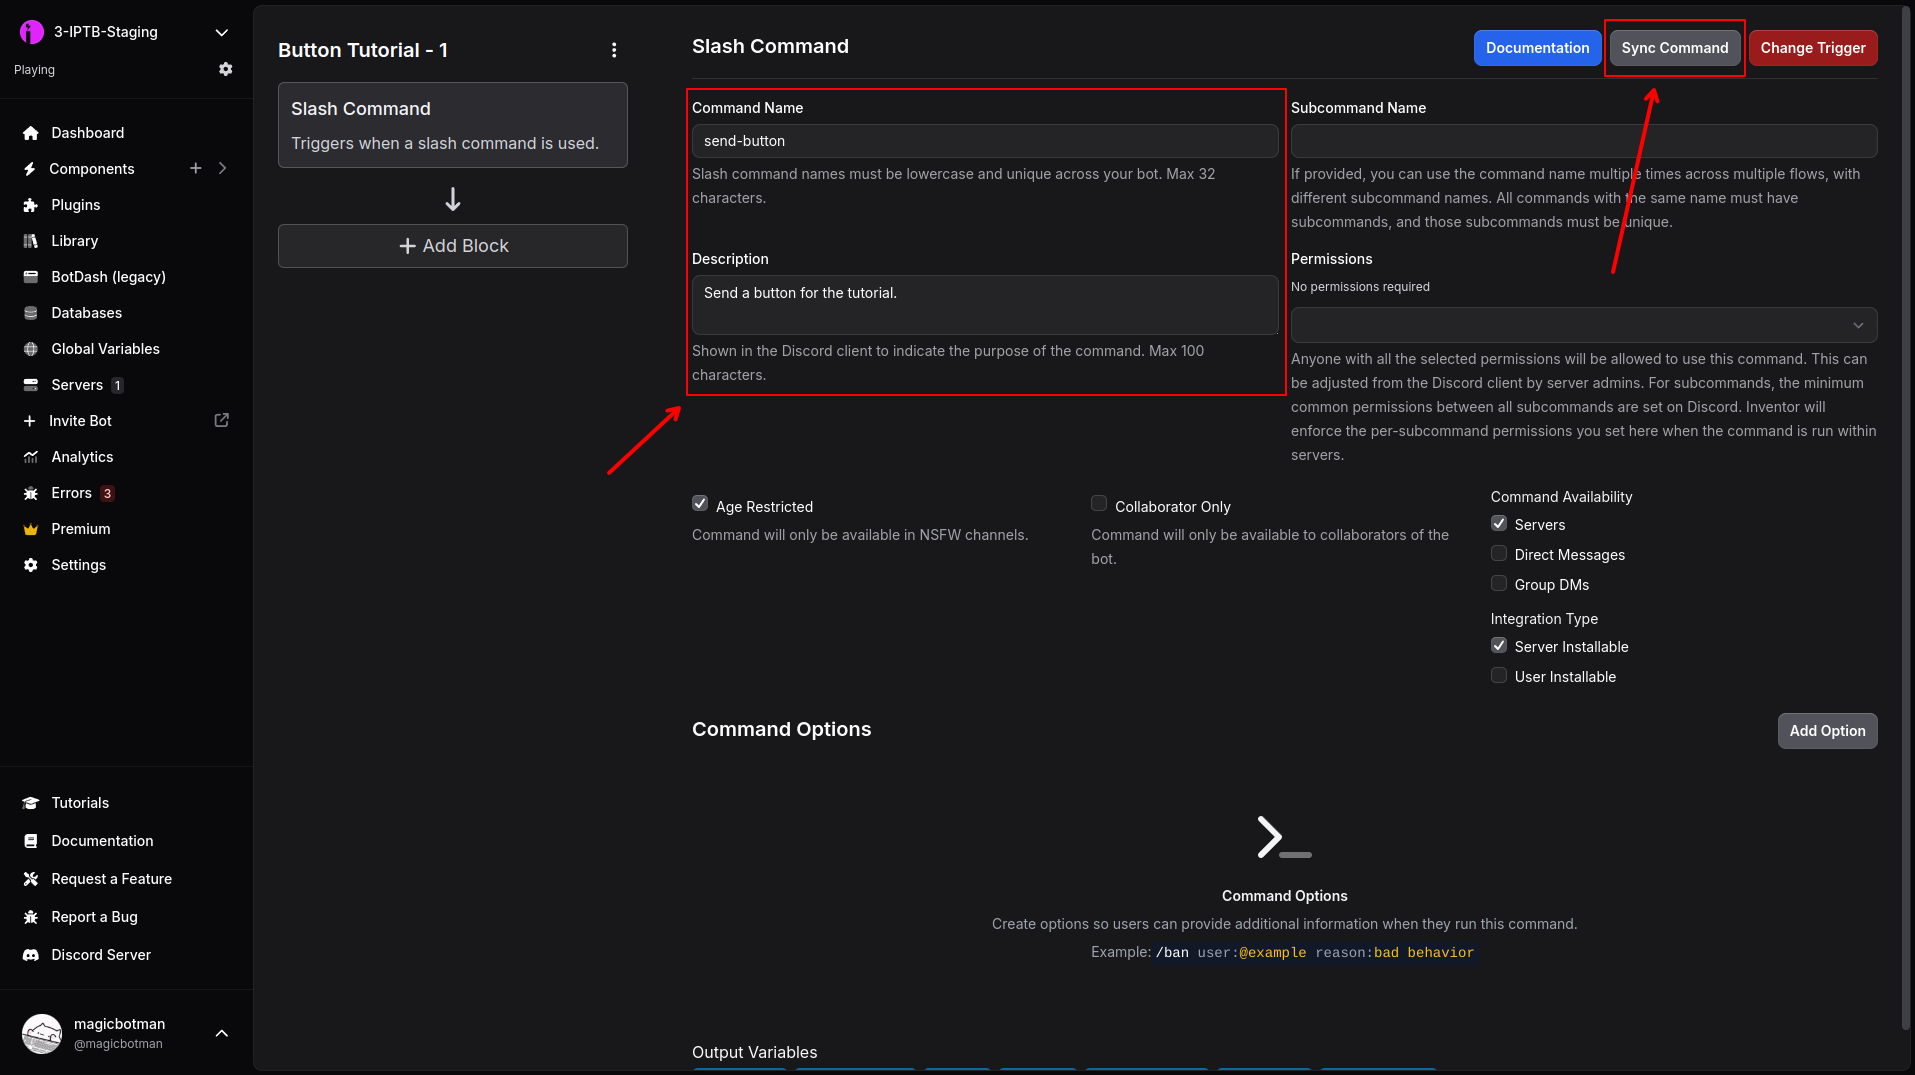
Step 2 - Setup and Sync Command
Enter a command name and description, then click "Sync Command".
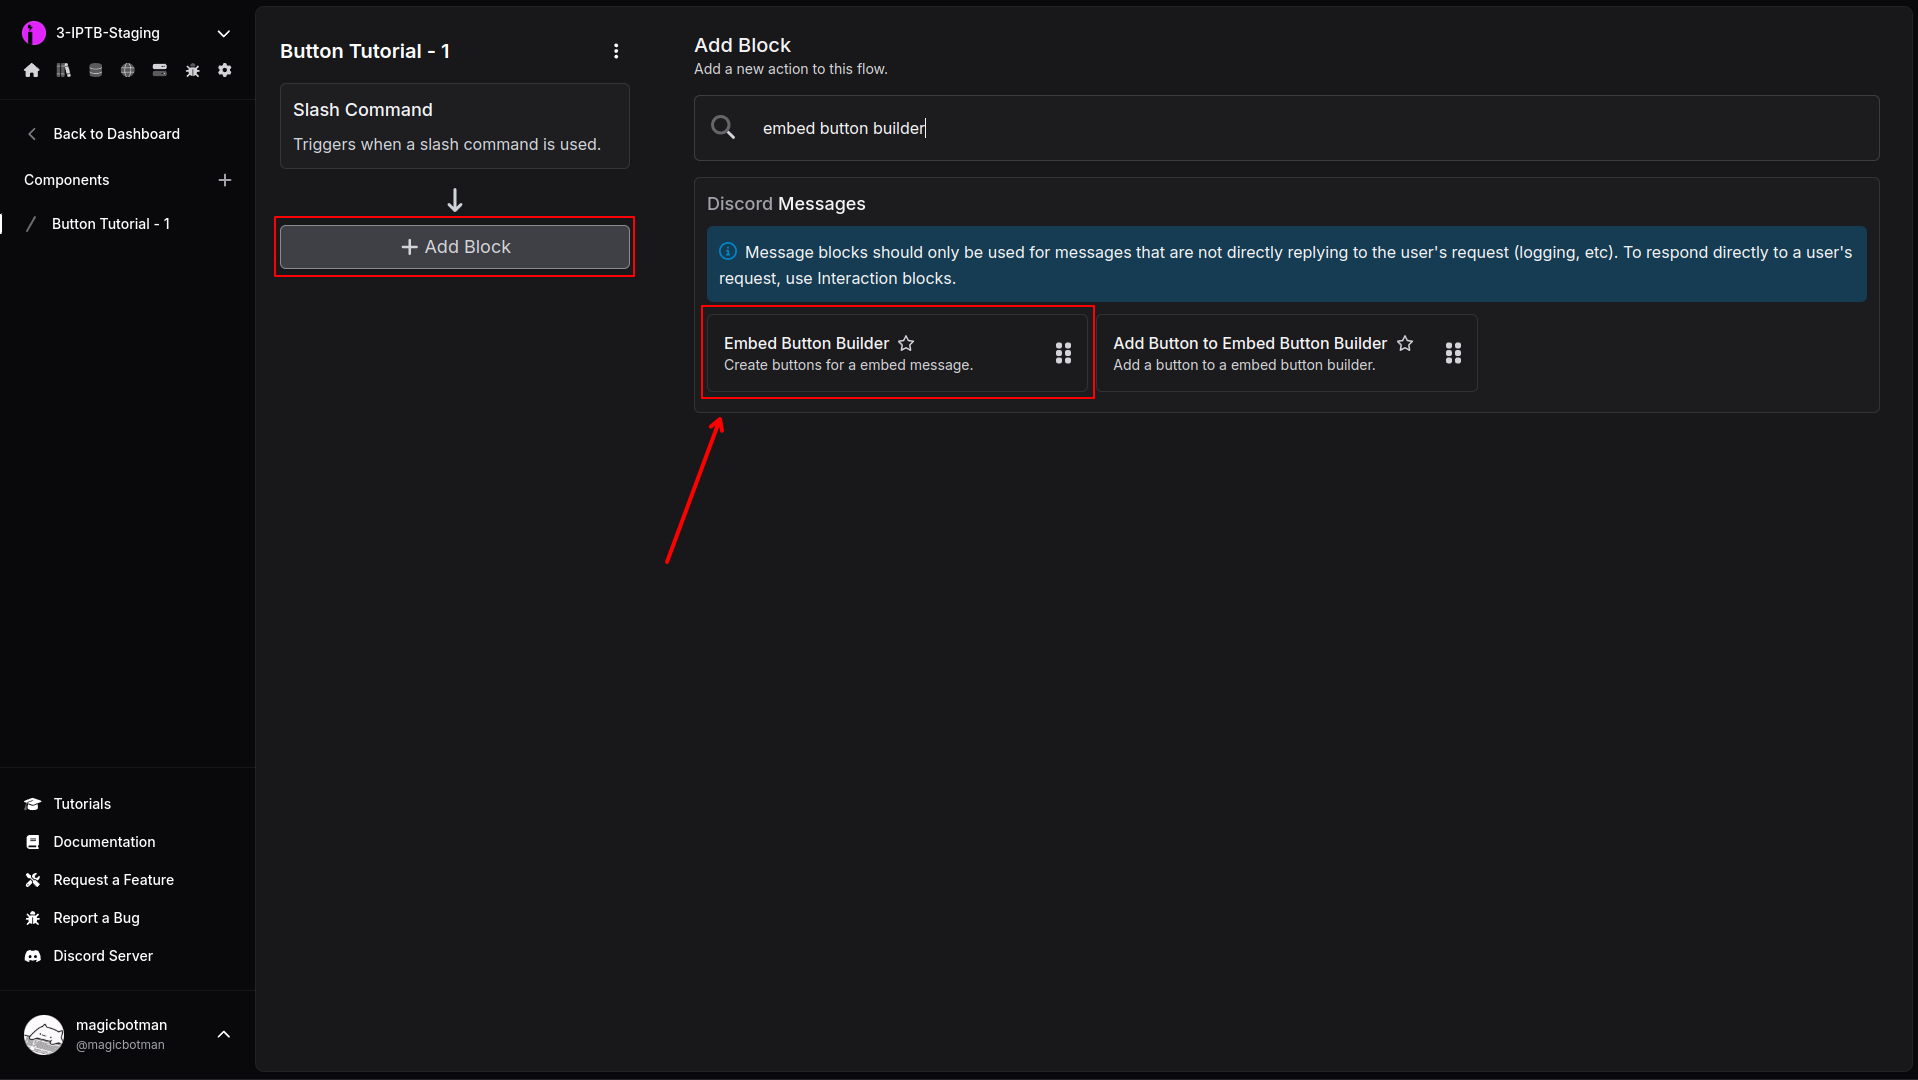
Step 3 - Add an Embed Button Builder Block
Switch to the Add Block page, then add an Embed Button Builder block.
Step 4 - Fill in First Button
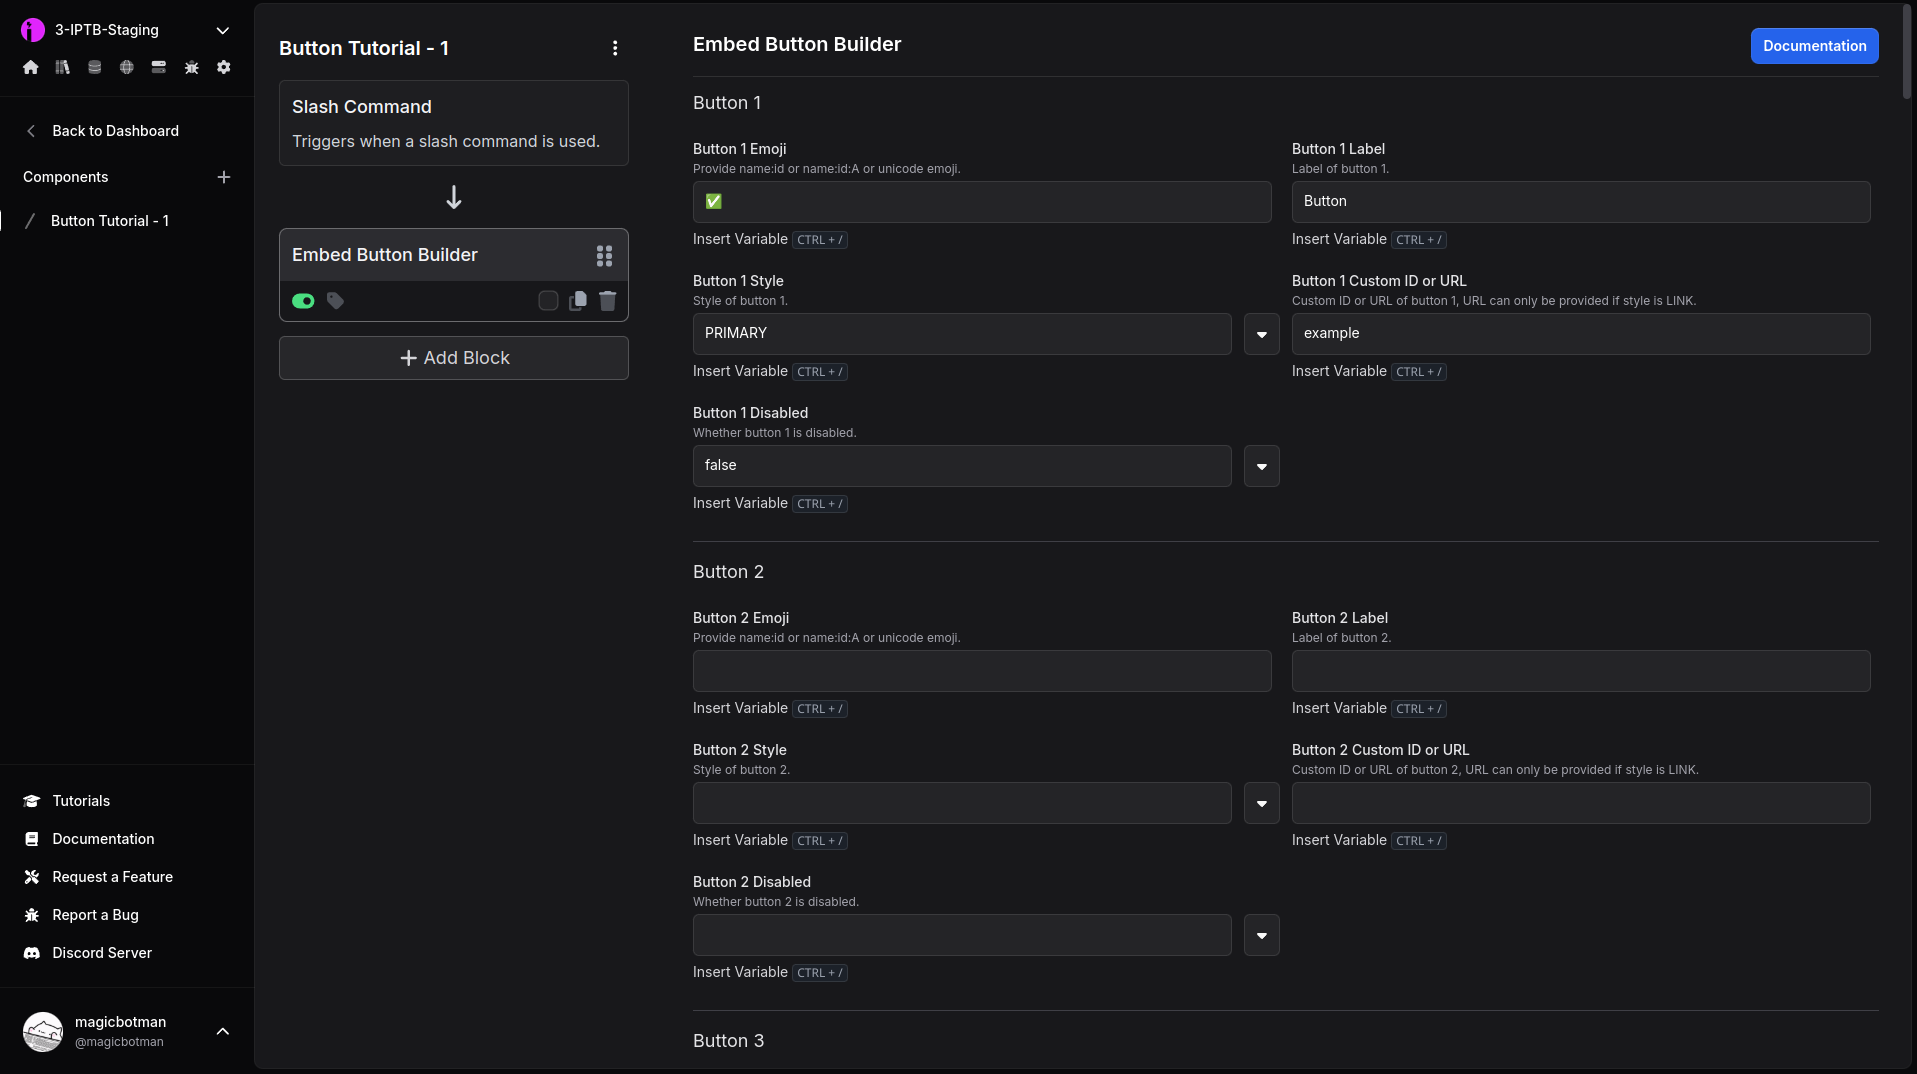
Fill in the details for only the first button. You must fill out all fields. For the dropdown fields, click the down arrow then select an option rather than typing it in. For the emoji, you can copy/paste this one ✅ or search for an online emoji directory for copy/pasting.
Be sure to set the Custom ID field to "example" (or another value, just remember it for later).
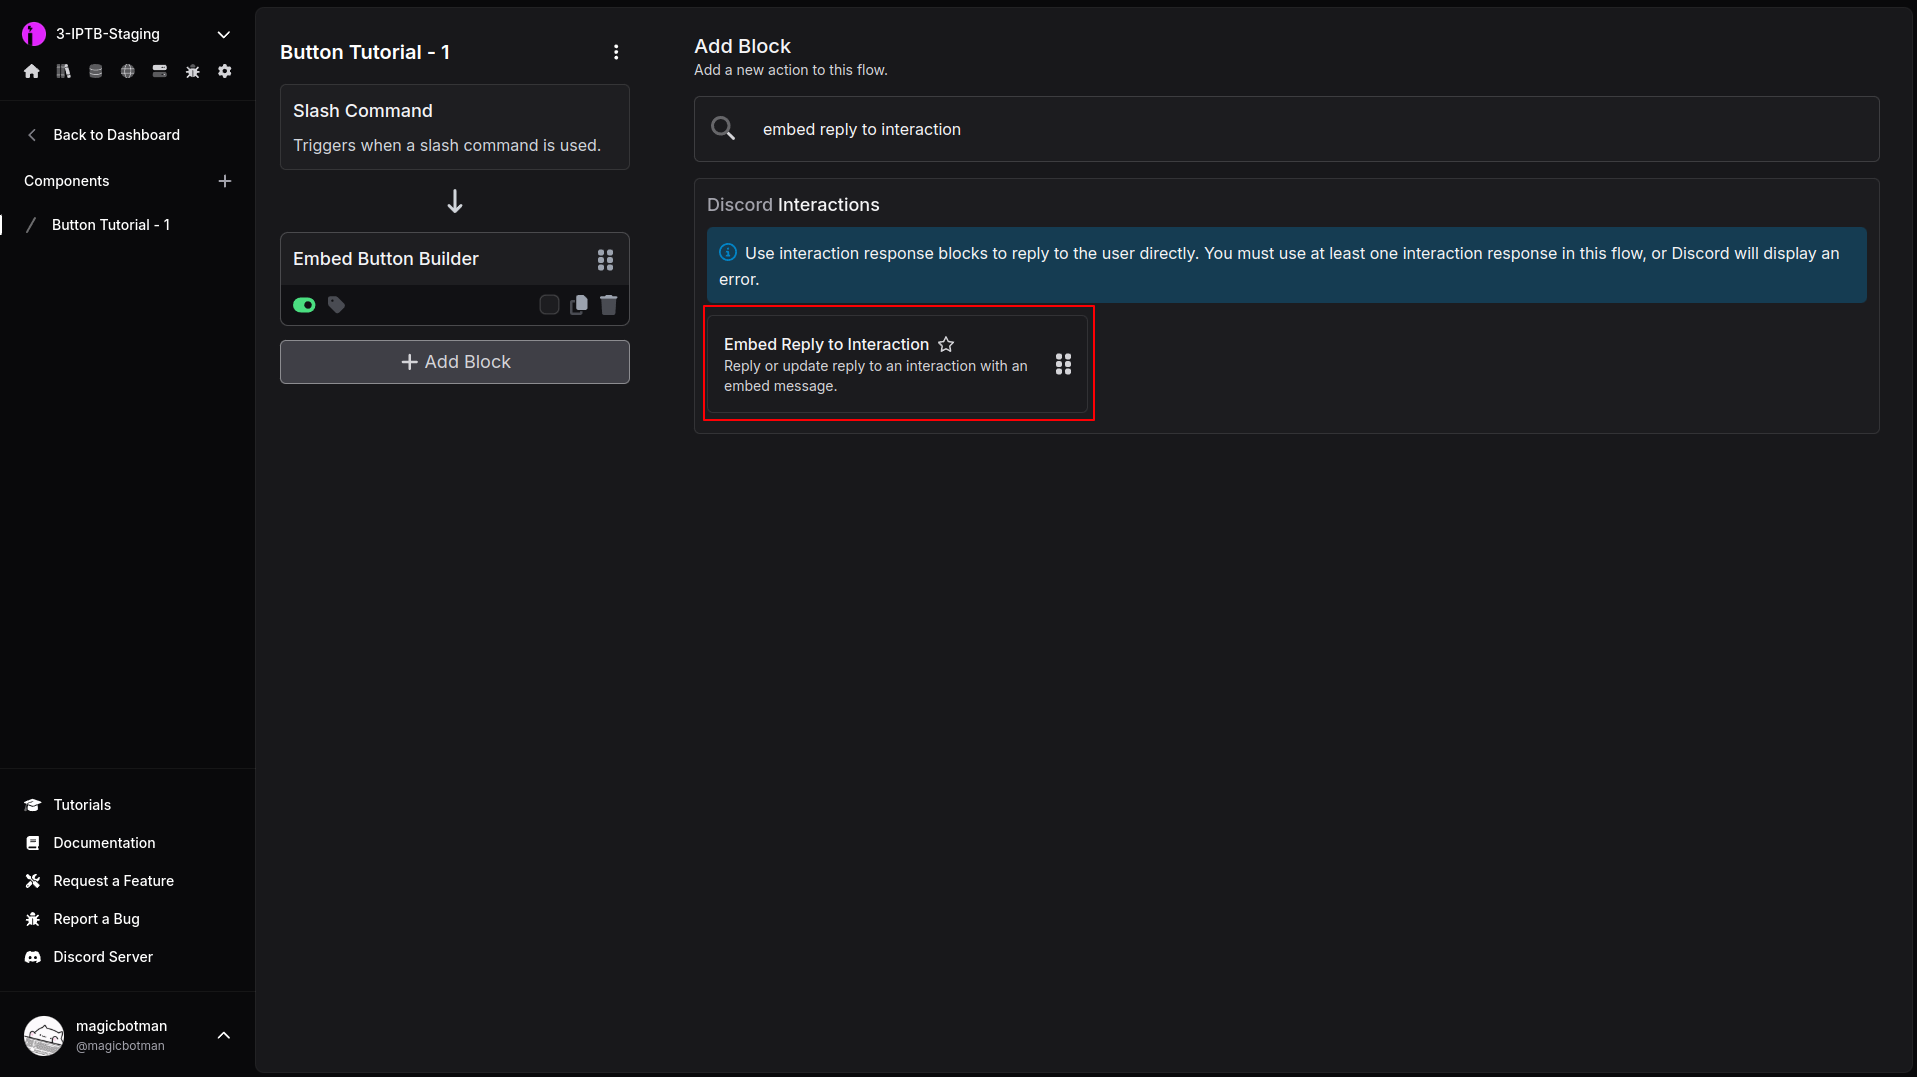
Step 5 - Add a Embed Reply to Interaction Block
Step 6 - Fill in Content
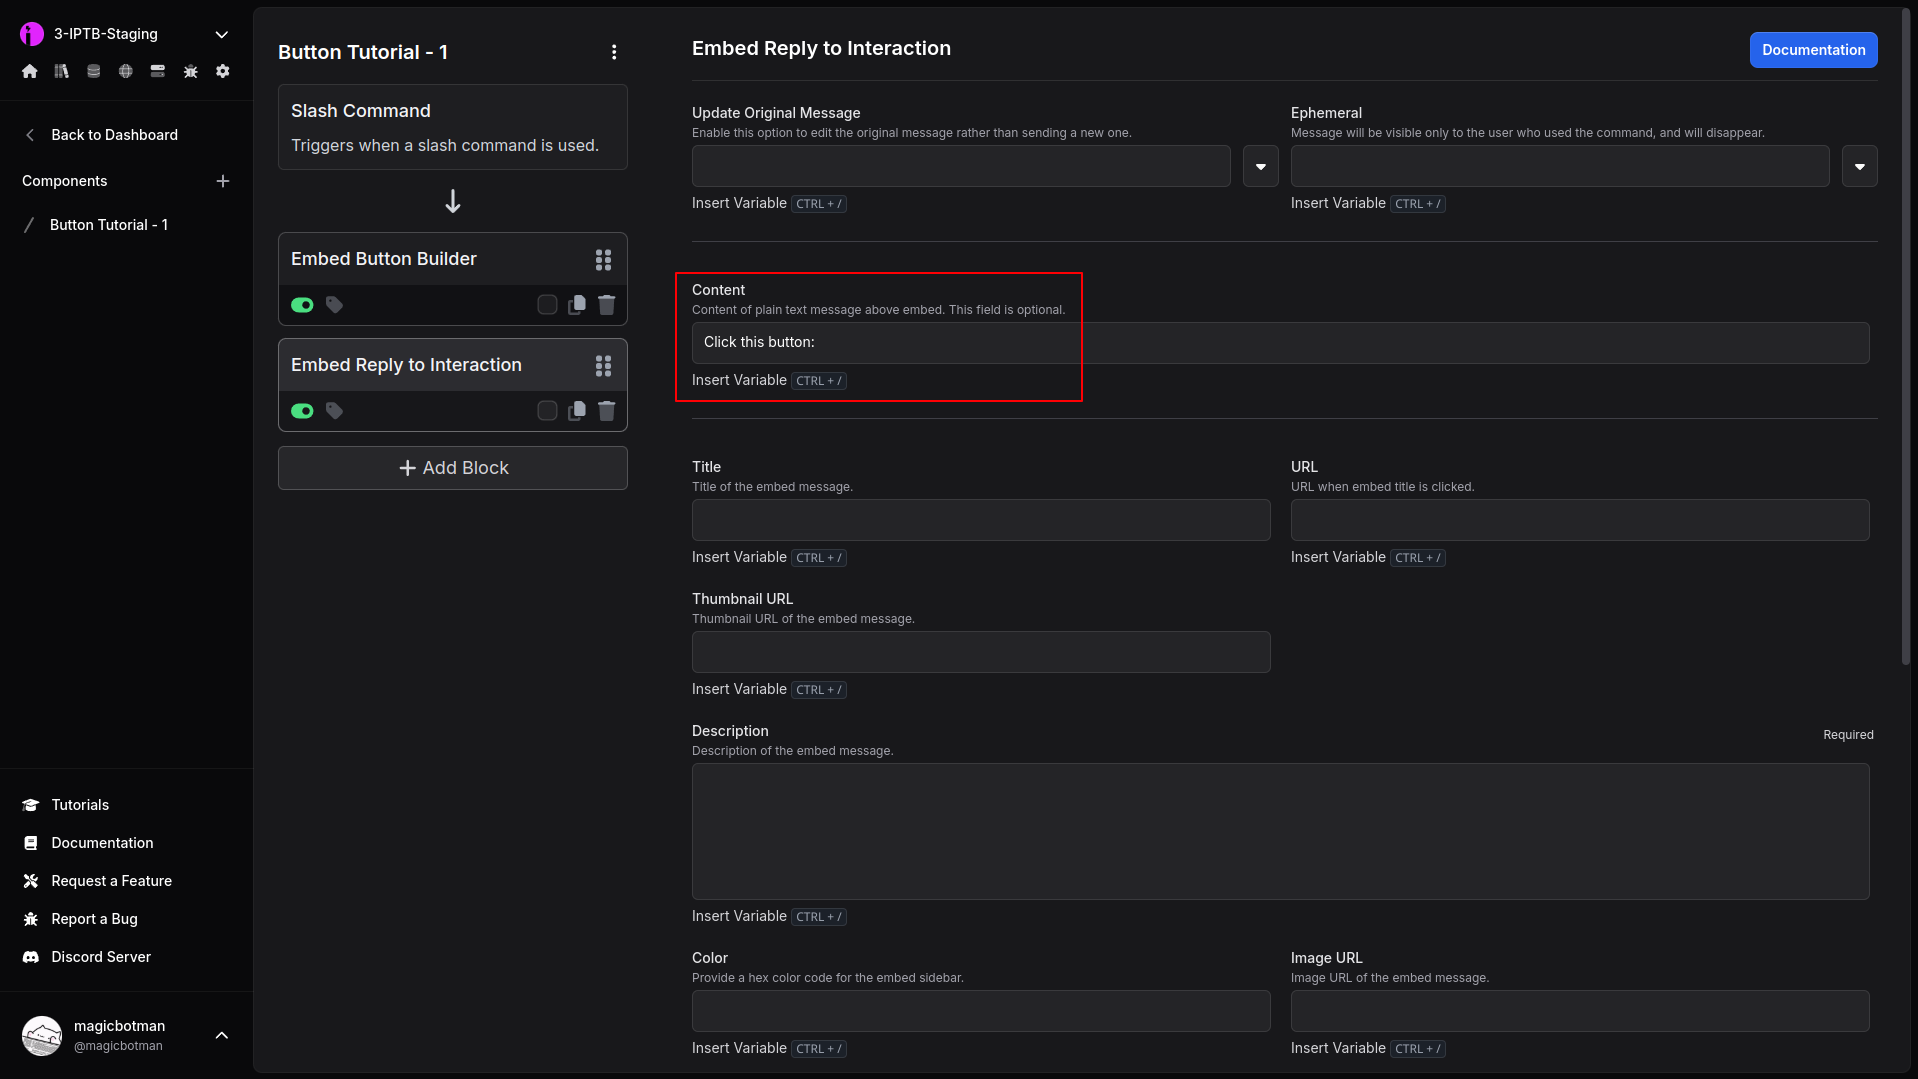
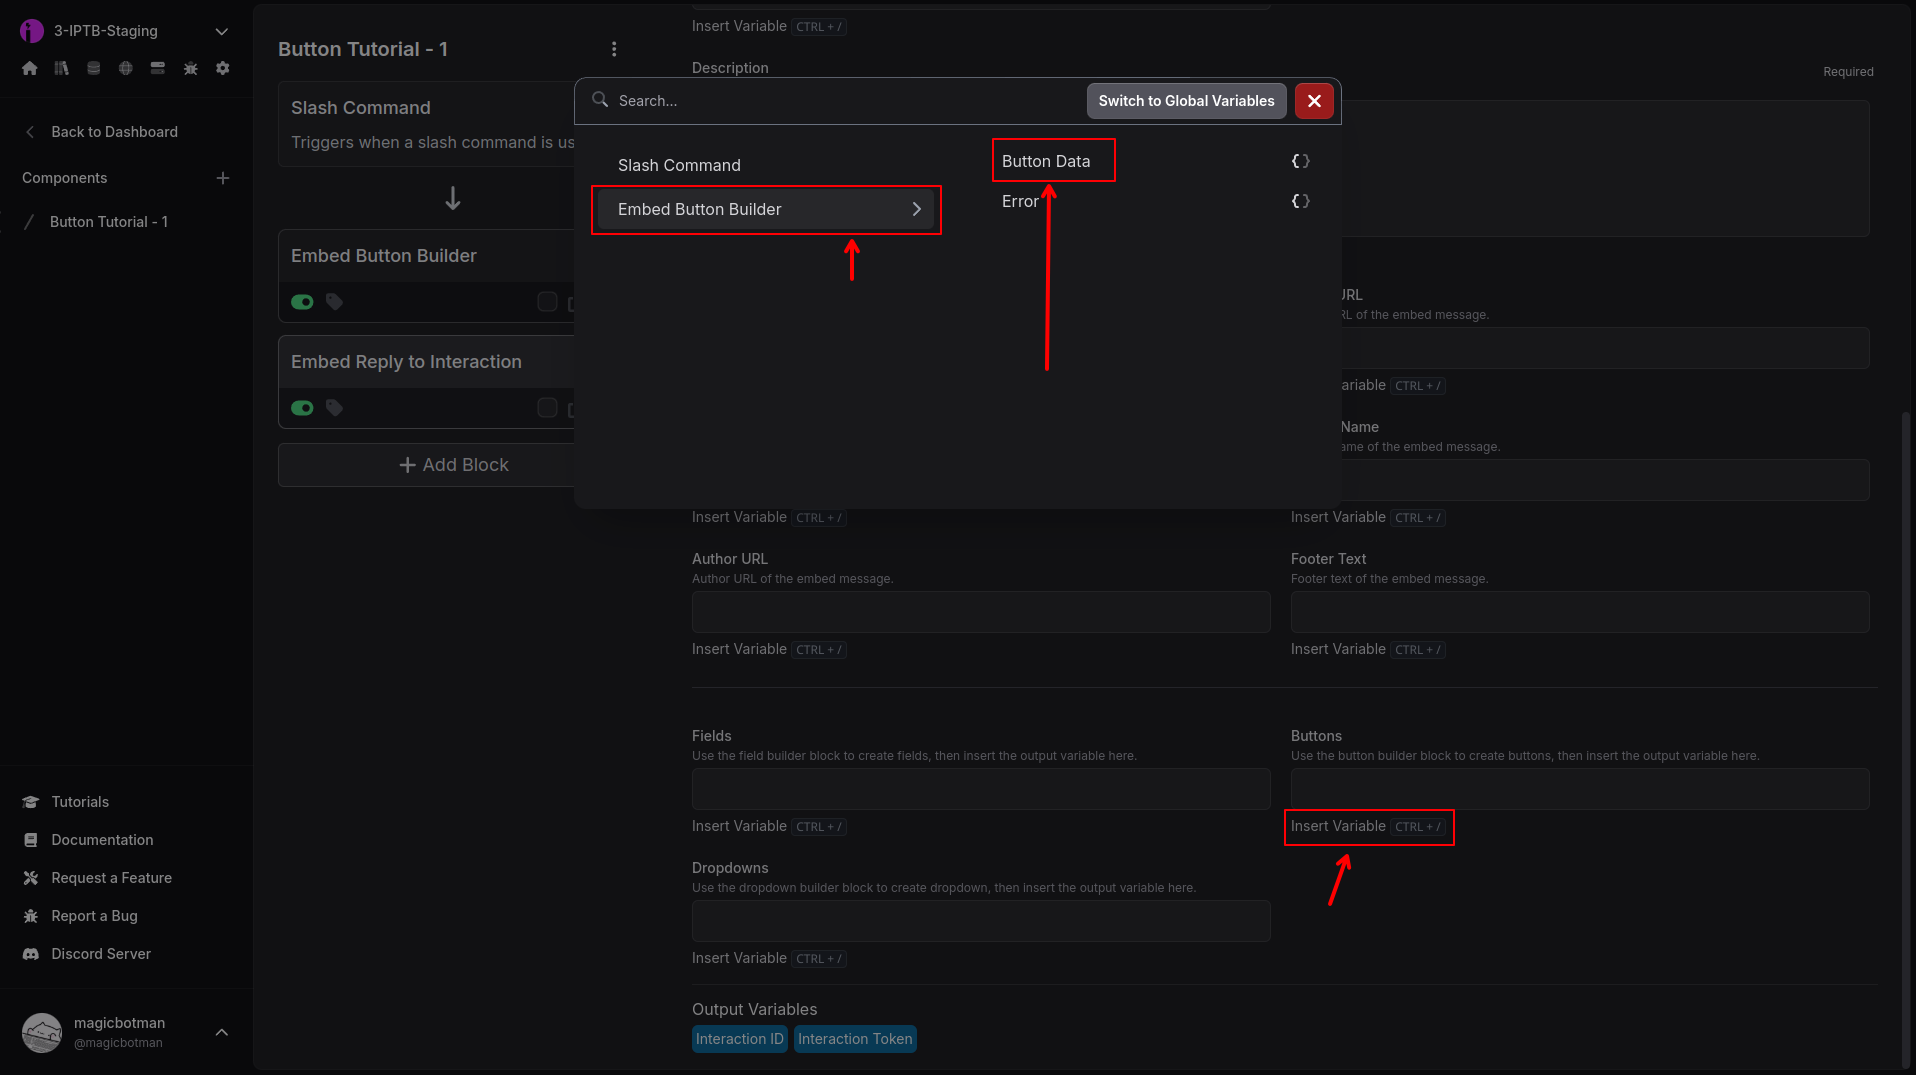
Fill in the content field, then insert the Embed Button Builder - Button Data output in the Buttons field.
Step 7 - Create Second Flow
We've now created the first part - the user can run a slash command, and will see a button on Discord.
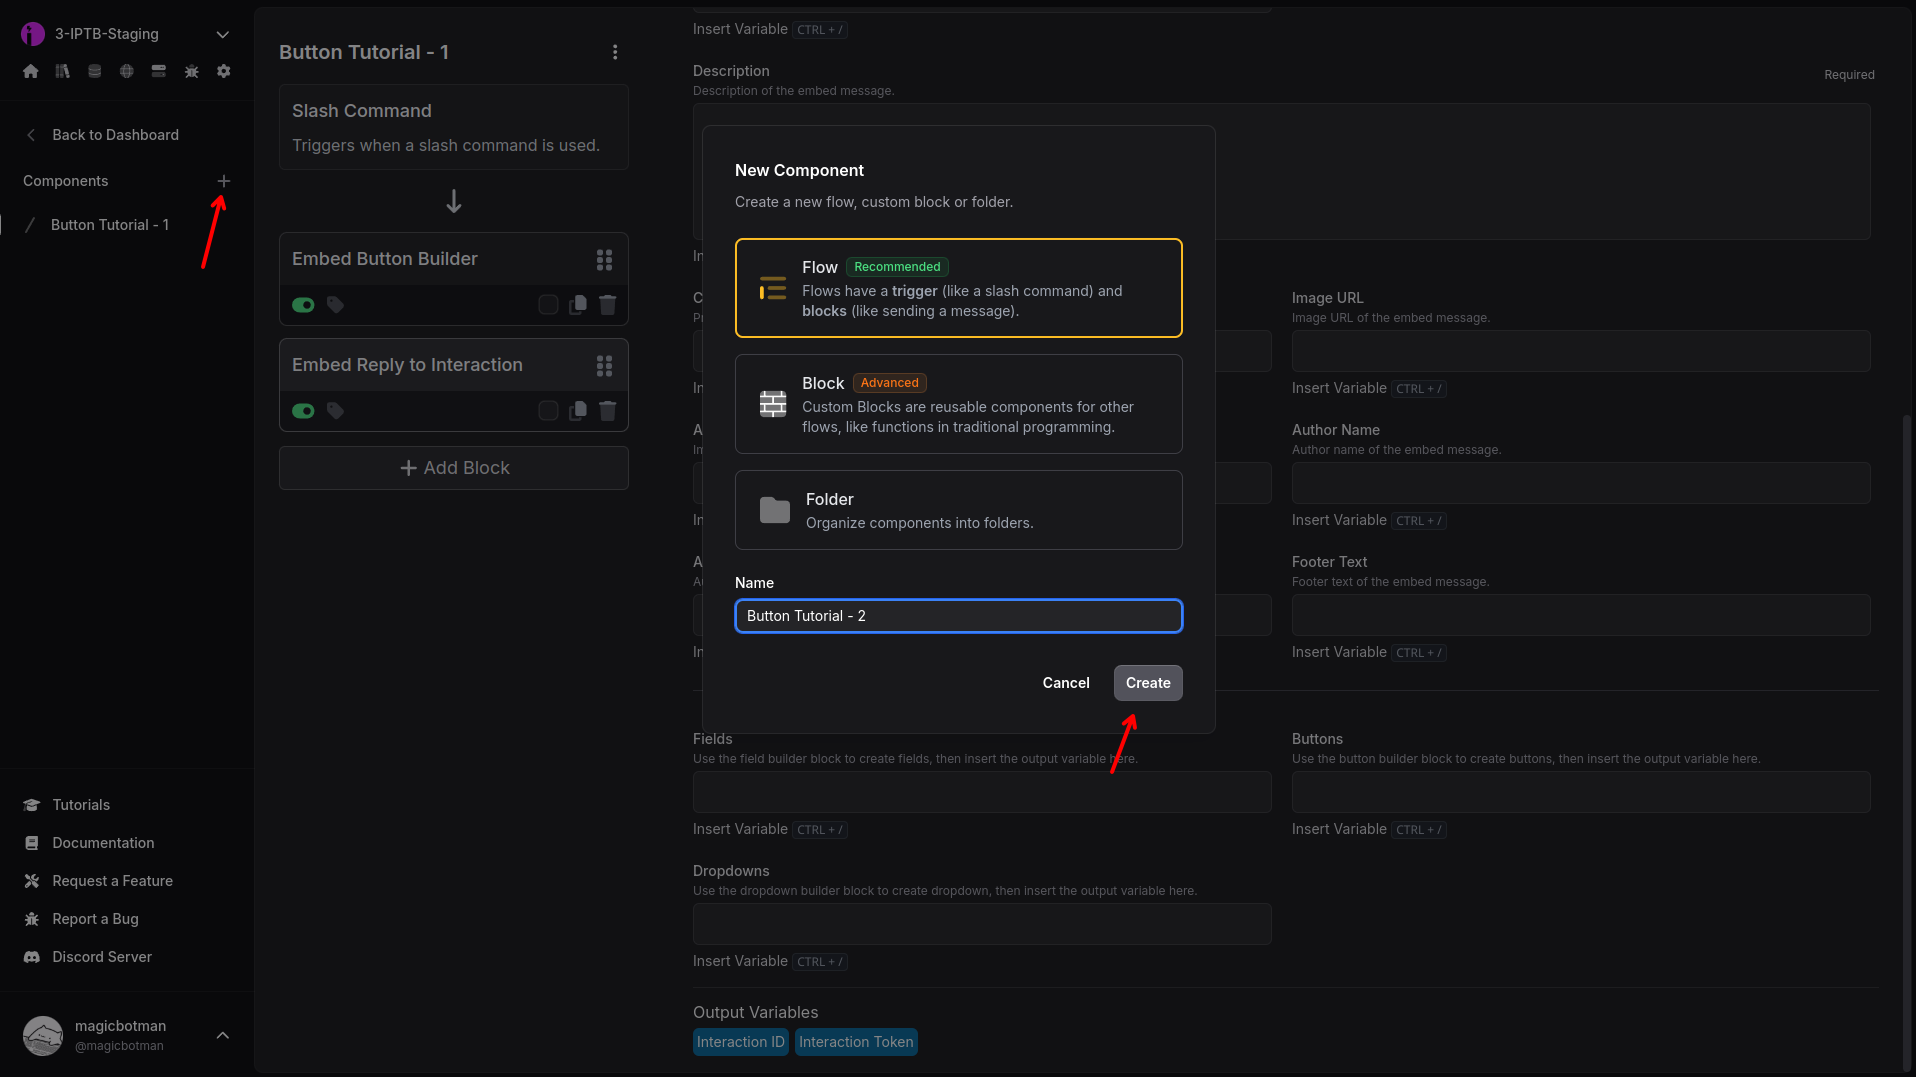
It's time to create the second part, which will respond to the button press.
To do this, we need to create a new flow.
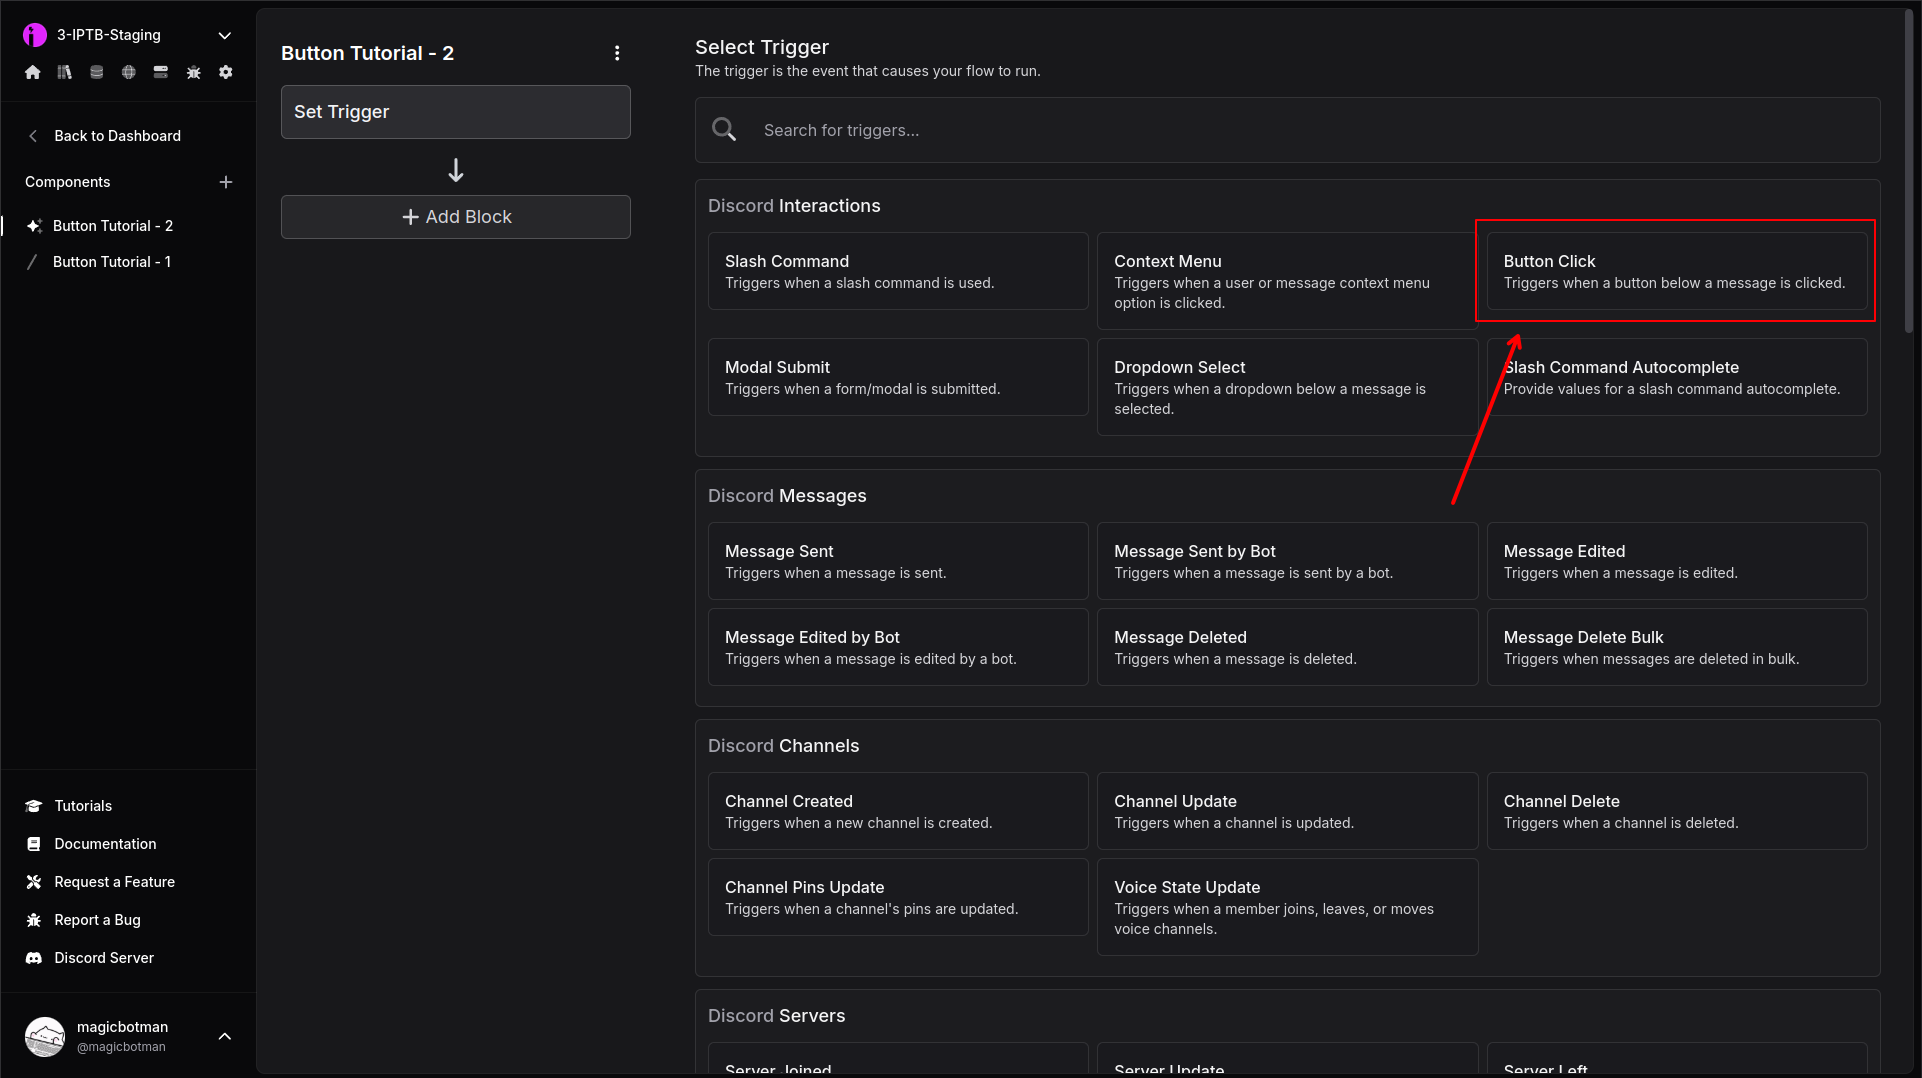
Step 8 - Select the Button Click Trigger
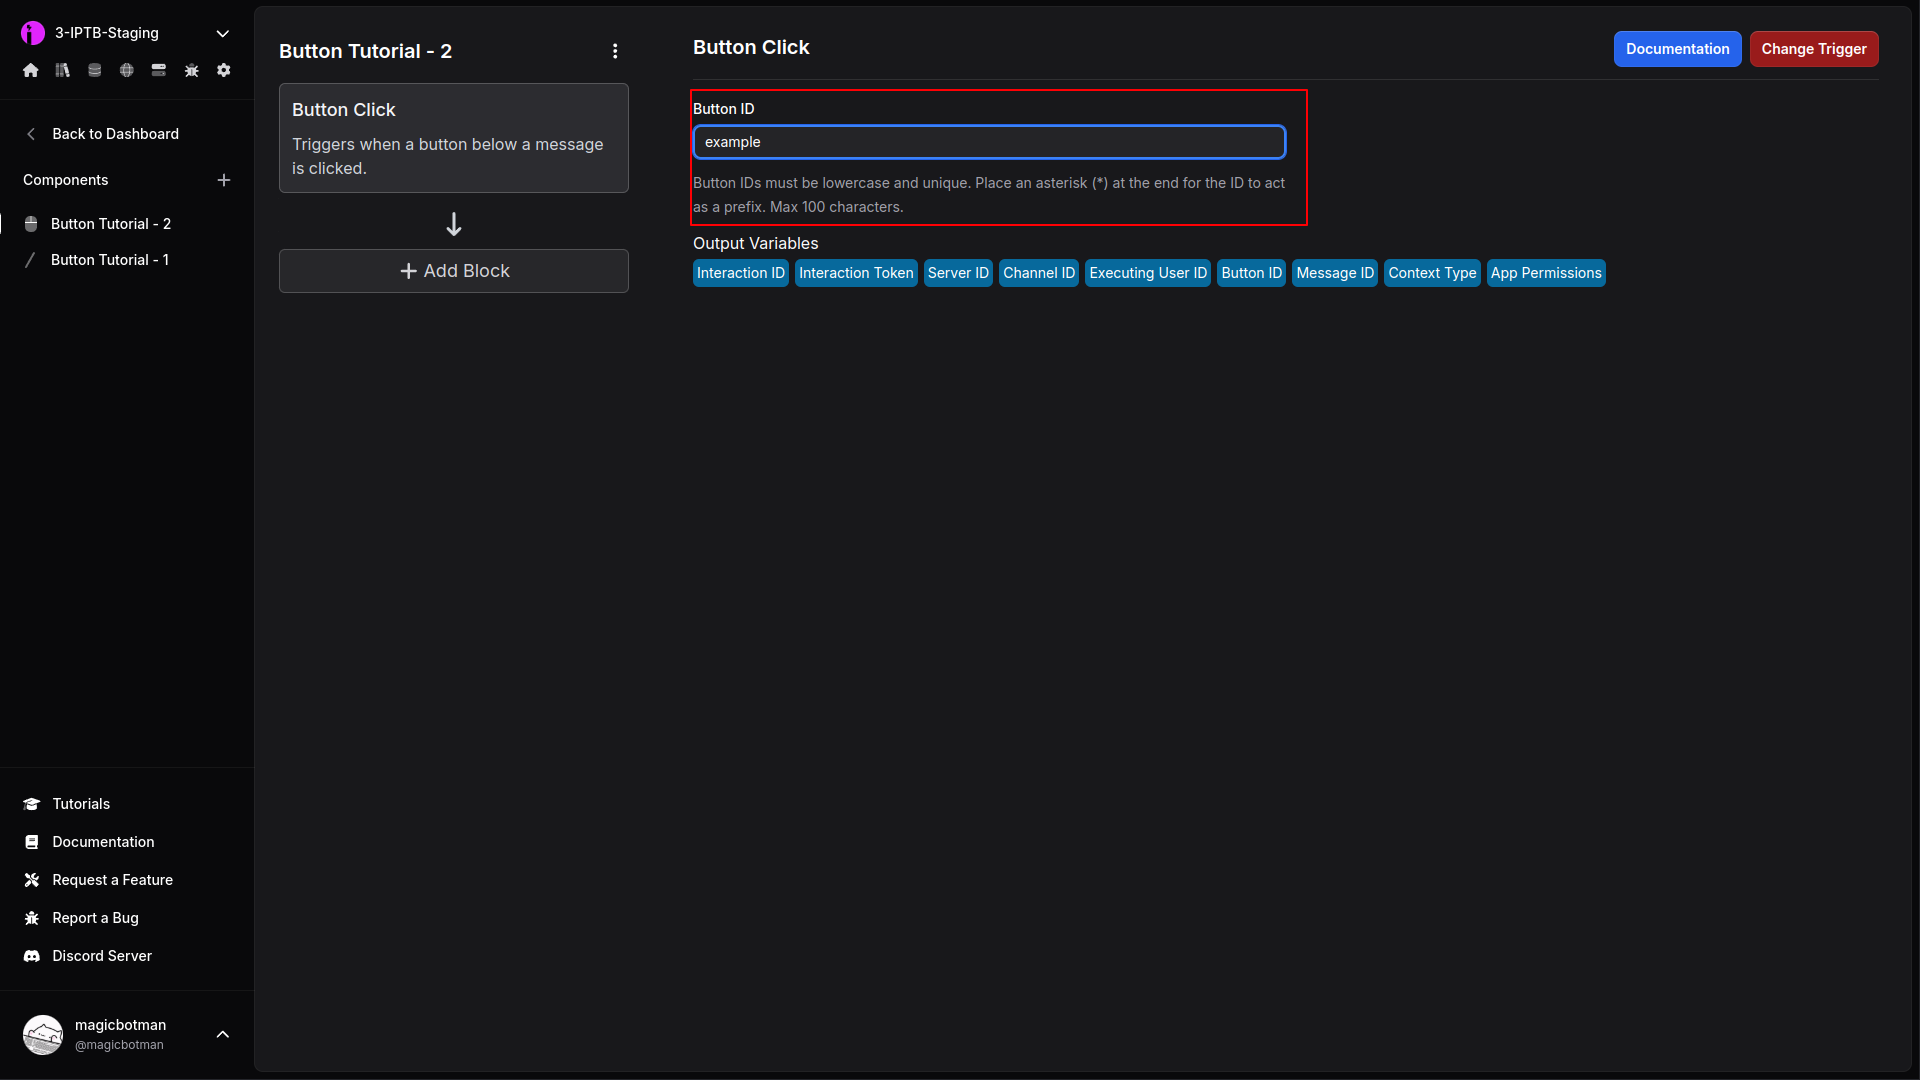
Step 9 - Set the Button ID
This should be set to the same value we used when filling out the button builder earlier. We suggested setting this to "example".
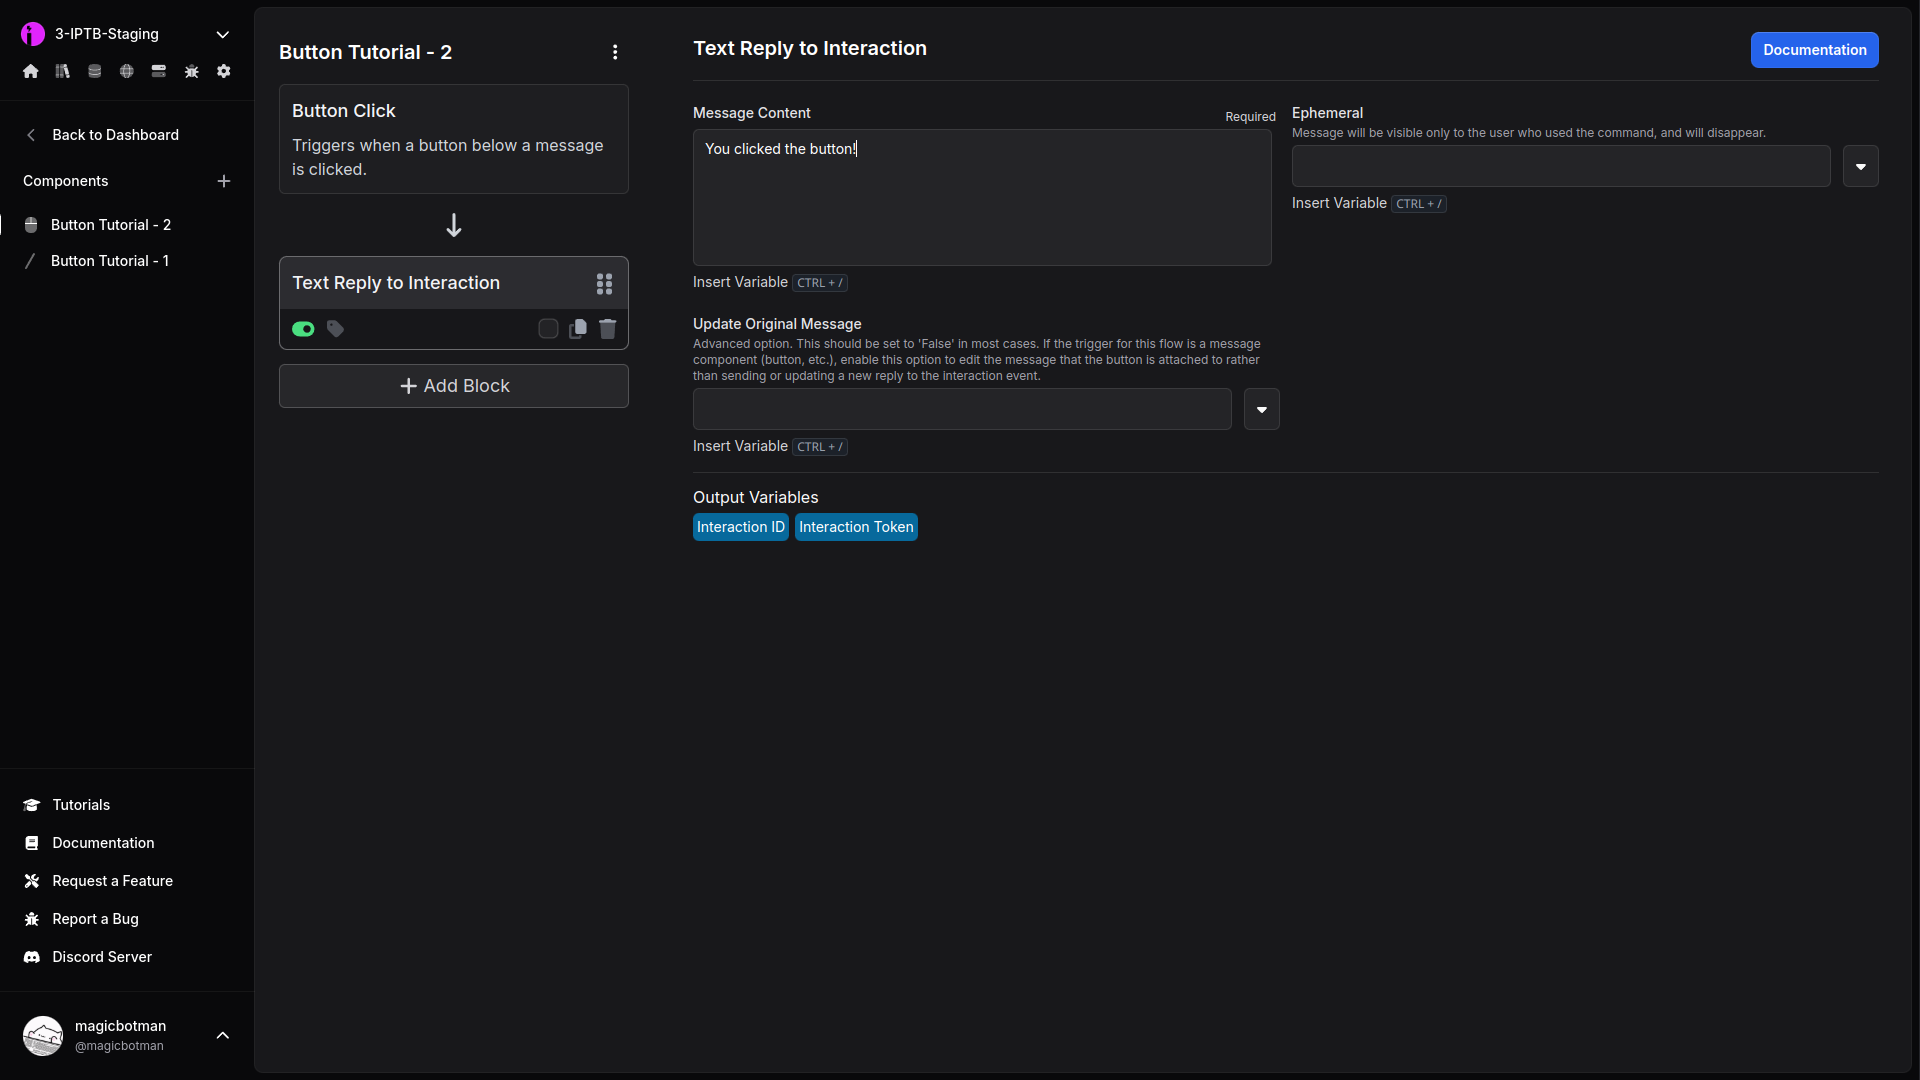
Step 10 - Add a Text Reply to Interaction Block
This will reply after the user clicks the button.
Step 11 - Test Everything on Discord
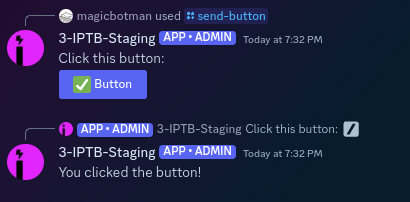
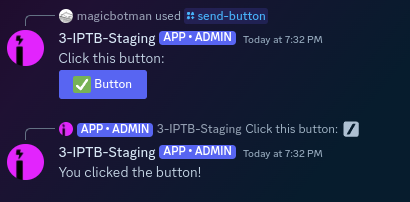
Go into a Discord server with your bot and run the /send-button command, then click the button. You should get a result that looks like this:
If the command isn't showing up, make sure you synced it from the trigger page.